Unlock the hidden potential of your Windows 10 computer by safely cleaning registry errors.
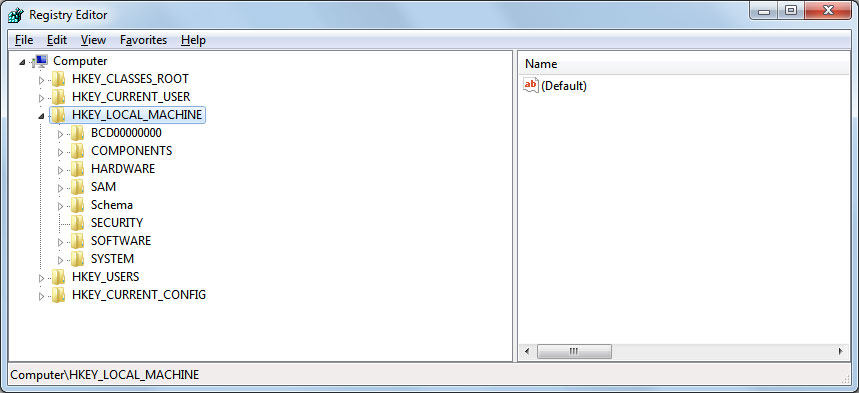
Open the Registry Editor
To open the Registry Editor in Windows 10 and safely clean registry errors, follow these steps:
1. Press the Windows key + R to open the Run dialog box.
2. Type “regedit” and press Enter to open the Registry Editor.
Once the Registry Editor is open, you can navigate through the different sections and make changes to the registry entries. It’s important to be cautious when making changes as incorrect modifications can cause issues with your computer.
To clean registry errors, you can manually delete invalid or outdated entries, or use a trusted registry cleaner software. Always create a backup of your registry before making any changes.
Remember, the registry is a critical part of your system, so it’s best to seek expert guidance if you’re unsure about making any modifications.
By regularly cleaning and maintaining your registry, you can help improve the performance of your Windows 10 PC and avoid potential errors.
Create a Registry Backup
Creating a Registry Backup in Windows 10 is an essential step to safely clean registry errors. By backing up your registry, you can ensure that your system is protected in case any issues arise during the cleaning process.
To create a registry backup, follow these steps:
1. Open the Registry Editor by pressing the Windows key + R, typing “regedit” and pressing Enter.
2. In the Registry Editor window, navigate to “File” in the top menu and select “Export”.
3. Choose a location to save the backup file and give it a descriptive name.
4. Under the Export Range section, select “All” to back up the entire registry or choose “Selected branch” to back up specific registry keys.
5. Click “Save” to create the backup file.
Remember to regularly create registry backups to safeguard your system against any potential issues. In case you encounter any problems, you can easily restore your registry from the backup file.
By following these steps, you can confidently clean registry errors in Windows 10 without worrying about losing important system settings or encountering any complications.
Clean up Program and Application Registry Entries
- Open Registry Editor by pressing Win + R on your keyboard, typing in “regedit”, and hitting Enter.
- Back up your registry before making any changes. To do this, click on “File” in the top menu, then select “Export”. Choose a location to save the backup file and provide a name for it. Click “Save”.
- Navigate to the program registry entries by expanding the following folders:
- HKEY_CURRENT_USERSoftware
- HKEY_LOCAL_MACHINESoftware

Look for the specific program or application entries you want to clean up.
- Delete the program registry entries by right-clicking on the entry and selecting “Delete”. Confirm the deletion when prompted.
- Repeat step 4 for each program or application entry you want to remove from the registry.
Clean up Prematurely Removed Software Registry Entries
To clean up prematurely removed software registry entries in Windows 10 safely, follow these steps:
1. Open the Windows Registry Editor by pressing the Windows key + R, typing “regedit,” and pressing Enter.
2. In the Registry Editor window, navigate to the following location: HKEY_LOCAL_MACHINESOFTWAREMicrosoftWindowsCurrentVersionUninstall
3. Look for any registry entries related to the software you have removed prematurely. Right-click on the entry and select “Delete” to remove it.
4. Repeat step 3 for any other registry entries related to prematurely removed software.
5. Once you have finished deleting the registry entries, close the Registry Editor.
Note: Be cautious when modifying the registry, as incorrect changes can cause system instability. It is recommended to back up the registry before making any changes.
By following these steps, you can safely clean up prematurely removed software registry entries in Windows 10, ensuring a more optimized and error-free system.
Clean up Invalid Shared DLLs
Invalid shared DLLs can cause issues with your computer’s performance and stability. To clean up these invalid DLLs and ensure a smooth-running system, follow these steps:
1. Open the Windows Registry Editor by pressing the Windows key + R, typing “regedit,” and pressing Enter.
2. Backup your registry before making any changes. In the Registry Editor, click on “File” in the top menu and select “Export.” Choose a location to save the backup file and give it a descriptive name.
3. Navigate to the following registry key: HKEY_LOCAL_MACHINESOFTWAREMicrosoftWindowsCurrentVersionSharedDLLs
4. In the right pane, you will see a list of DLL files. Look for any entries that have a value of “0” or are no longer in use.
5. Right-click on the invalid DLL entry and select “Delete.” Confirm the deletion when prompted.
6. Repeat steps 4 and 5 for any other invalid DLL entries.
7. Close the Registry Editor and restart your computer for the changes to take effect.
By cleaning up invalid shared DLLs in the Windows Registry, you can improve your system’s performance and stability. Remember to always exercise caution when making changes to the registry and backup your registry before proceeding.
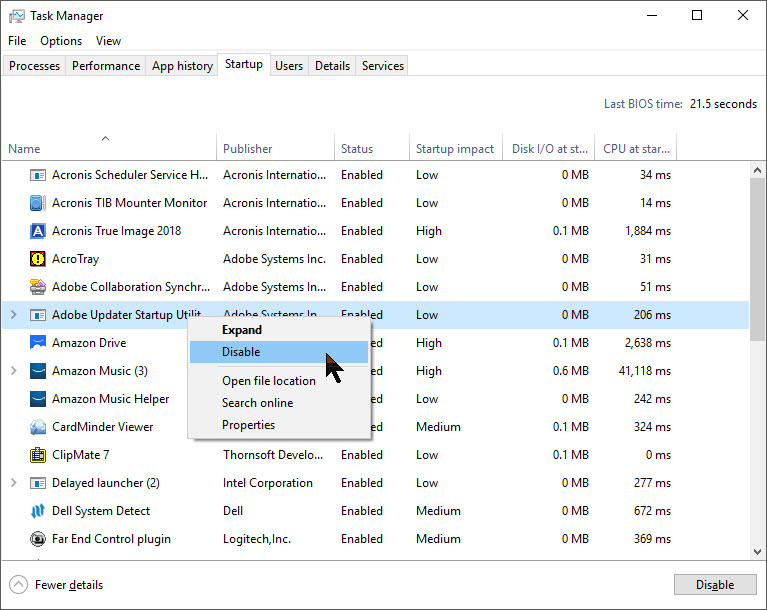
Clean up Startup Items
- Identify unnecessary startup items
- Improve system performance by removing unwanted startup programs

- Reduce clutter and speed up boot time
- Prevent unnecessary programs from launching at startup
- Streamline the boot process for a faster Windows 10 experience
- Manage startup items efficiently to optimize system resources

- Enhance overall system stability by eliminating unnecessary startup entries
- Safely disable or remove startup items without affecting essential system processes
- Maximize available system resources by eliminating unnecessary startup programs
- Ensure a clean and efficient startup process for your Windows 10 PC

Causes of Registry Errors
– Incorrect or incomplete installation/uninstallation of software programs can leave behind invalid registry entries.
– Malware or viruses can modify or delete registry keys, causing errors.
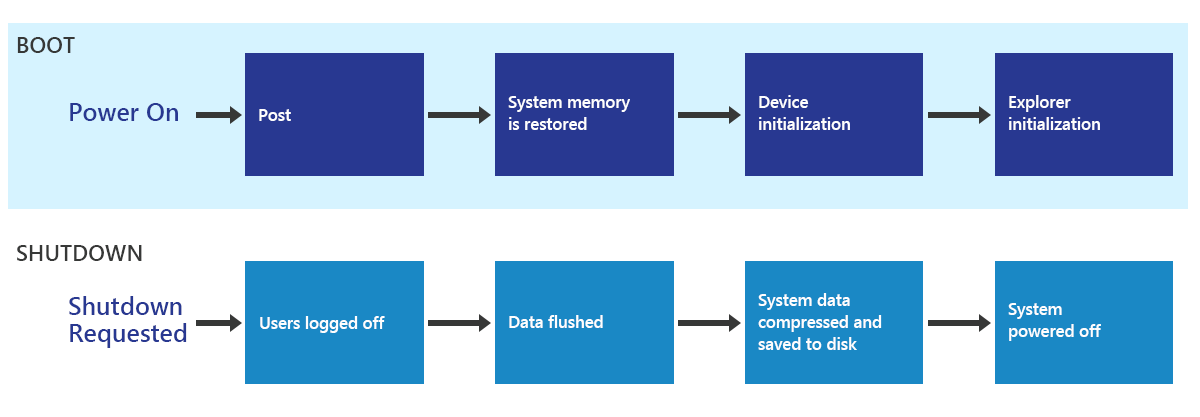
– Power outages or improper shutdowns can lead to corrupted registry files.
– Hardware issues, such as faulty RAM or hard drive errors, can affect the registry.
– Outdated or incompatible device drivers can cause registry errors.
– Over time, the registry can become cluttered with unnecessary or obsolete entries.
To safely clean registry errors in Windows 10:
1. Use the built-in Windows Registry Checker tool, Scanreg.exe, to scan and automatically fix registry errors.
2. Consider upgrading to Windows 11, as it includes improvements to the registry and better error handling.
3. Use a reputable registry cleanup tool, like Auslogics Registry Cleaner, to scan and remove invalid entries.
4. Manually edit the registry using a free registry editor, but exercise caution and create a backup beforehand.
5. Use the command prompt to run utilities like Scanregw.exe for more advanced troubleshooting.
6. Consult the Help file or online resources for more information on specific error messages and methods to resolve them.
Remember to always back up your registry before making any changes and proceed with caution.
Frequently Asked Questions
Q: What is the Windows Registry and why should I clean it?
A: The Windows Registry is a compilation of settings and configurations that store important information about your computer and its installed software. Over time, the registry can accumulate errors and unnecessary entries, which can slow down your system and cause stability issues. Cleaning the registry helps improve performance and resolve potential issues.
Q: How can I clean the registry safely?
A: Windows 10 includes a built-in utility called Windows Registry Checker (Scanreg.exe), which can scan and fix registry errors. To use it, open the command prompt and type “Scanregw.exe“. Alternatively, you can use third-party tools like Auslogics Registry Cleaner or Wise Registry Cleaner for a more comprehensive cleanup.
Q: Are there any risks involved in cleaning the registry?
A: While cleaning the registry is generally safe, it’s important to back up your registry before making any changes. This allows you to restore it in case something goes wrong. Additionally, be cautious when using free registry editors or modifying registry entries manually, as incorrect changes can cause system errors and lead to instability.
Q: What are the benefits of cleaning the registry?
A: Cleaning the registry can help improve system performance, fix broken registry items, and resolve error messages. It can also optimize the storage space used by the registry, resulting in faster startup times and smoother overall operations.
Remember to always exercise caution and refer to the help files or documentation provided by the utility or software program you are using for detailed instructions and information.

