In this article, we will explore effective solutions to resolve the nagging issue of low memory warning on Windows 8 systems. Discover simple yet powerful techniques to optimize your computer’s memory usage and enhance overall performance.
Understanding the “Your computer is low on memory” message
When you see the “Your computer is low on memory” message on your Windows 8 PC, it means that your system is running out of RAM. This can cause your computer to slow down or freeze.
To fix this issue, you can try the following steps:
– Close any unnecessary programs or tasks running in the background.
– Increase your virtual memory by adjusting the paging file size. Press the WIN key + R, type “sysdm.cpl” and hit Enter. Go to the “Advanced” tab, click on “Settings” under “Performance”, and then go to the “Advanced” tab. Click on “Change” under “Virtual memory”, uncheck “Automatically manage paging file size for all drives”, and then select “Custom size”. Set both the “Initial size” and “Maximum size” to a higher value.
– Check your startup programs and disable any unnecessary ones. Press the WIN key + R, type “msconfig”, and hit Enter. Go to the “Startup” tab and uncheck any programs that you don’t need to start automatically.
– Clear up disk space by deleting unnecessary files and programs. You can use the Disk Cleanup tool or manually delete files and folders that you no longer need.
– Upgrade your RAM if you constantly encounter low memory issues.
By following these steps, you can alleviate the low memory problem on your Windows 8 computer and improve its performance.
Methods to fix low memory issues on Windows 8
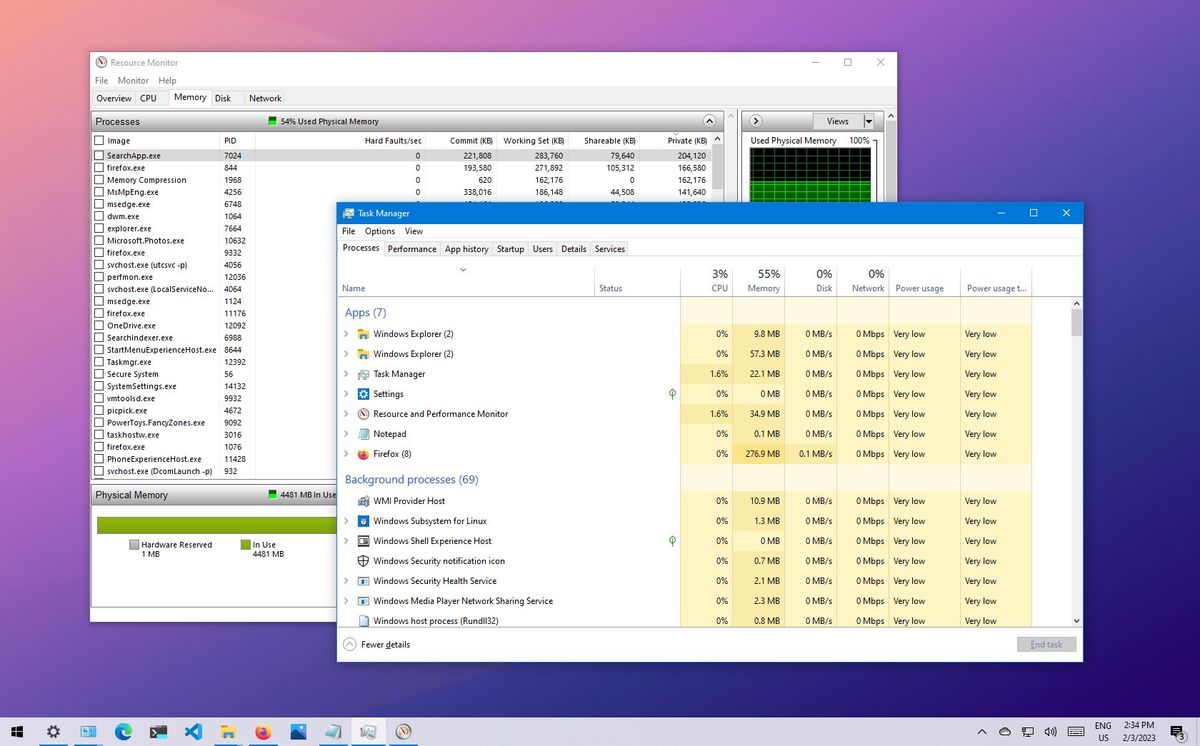
- Open Task Manager by pressing Ctrl+Shift+Esc
- Click on the Processes tab
- Identify the programs that are using a significant amount of memory
- Right-click on the program and select End Task
Method 2: Disable Startup Programs
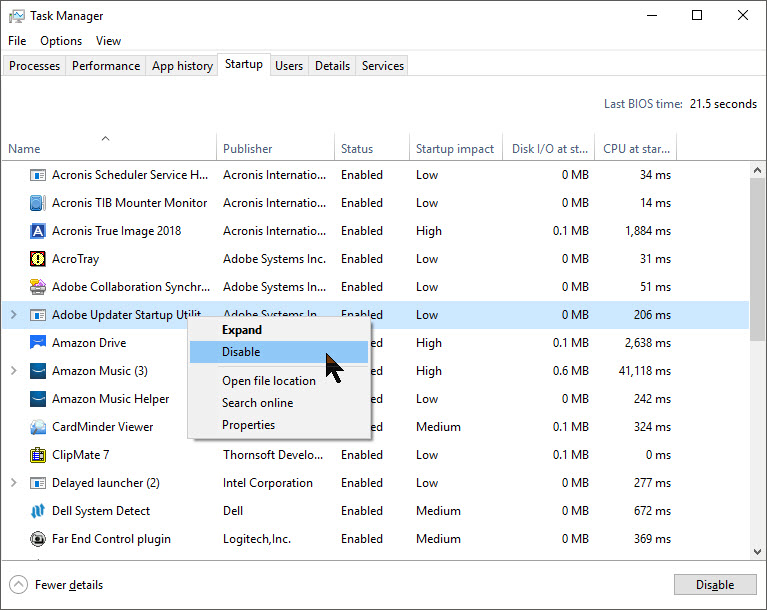
- Press Ctrl+Shift+Esc to open Task Manager
- Click on the Startup tab
- Identify the programs that are set to start automatically when Windows boots up
- Right-click on the program and select Disable
Method 3: Adjust Virtual Memory
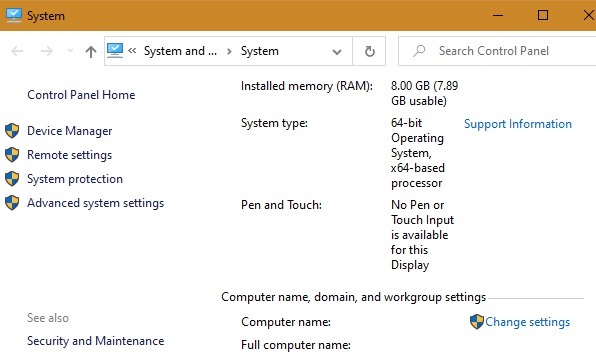
- Press Win+X and select System
- Click on Advanced system settings
- In the Performance section, click on Settings
- Go to the Advanced tab
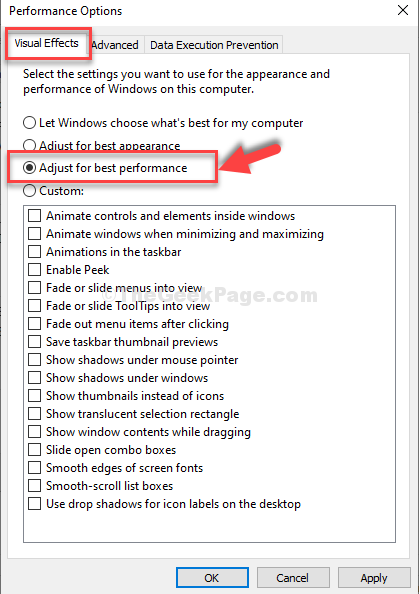
- Under the Virtual memory section, click on Change
- Uncheck the Automatically manage paging file size for all drives option
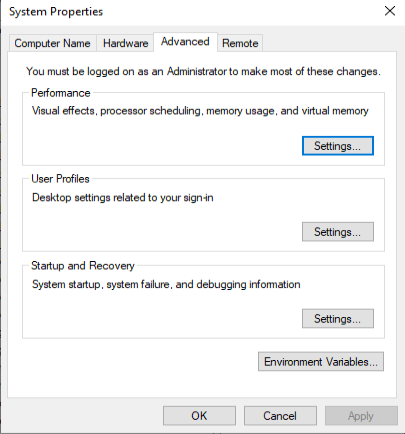
- Select the Custom size option
- Enter a higher value in the Initial size (MB) and Maximum size (MB) fields
- Click Set and then OK
Method 4: Clear Temporary Files
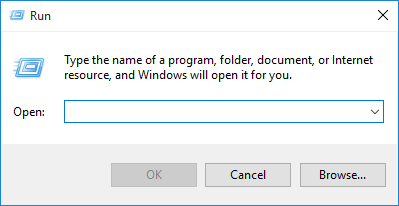
- Press Win+R to open the Run dialog box
- Type %temp% and press Enter
- Select all the files and folders in the temporary folder
- Press Shift+Delete to permanently delete them
Method 5: Upgrade RAM
- Check the specifications of your computer to determine the maximum supported RAM
- Purchase and install compatible RAM modules
- Follow the manufacturer’s instructions to properly install the RAM
Stopping programs that use excessive memory
If you’re experiencing a low memory warning on Windows 8, it’s likely due to certain programs using excessive memory resources. To resolve this issue, follow these steps:
1. Press Ctrl + Shift + Esc to open the Task Manager.
2. In the Processes tab, look for any programs that are using a lot of memory. Right-click on them and select “End Task” to stop them from running.
3. If the program causing the issue is something you frequently use, consider closing it temporarily or finding an alternative with lower memory usage.
4. To prevent the program from starting automatically and using excessive memory in the future, open the System Configuration utility by pressing the Windows key + R, typing “msconfig”, and hitting Enter. Go to the Startup tab and uncheck the box next to the program’s name.
5. Restart your PC to apply the changes.
By stopping programs that use excessive memory, you can fix the low memory warning and improve the performance of your Windows 8 computer.
python

import psutil

import ctypes
def check_memory_usage():
mem = psutil.virtual_memory()
if mem.available < 1024 * 1024 * 100: # Check if available memory is less than 100 MB
ctypes.windll.user32.MessageBoxW(0, "Low memory warning!", "Memory Alert", 0x40)
check_memory_usage()
In this example, we use the `psutil` library to retrieve memory usage information. The `virtual_memory()` function returns memory statistics, including the available memory. We then compare the available memory with a threshold value (100 MB in this case) and display a warning message using the `MessageBoxW` function from the `ctypes` library if the available memory is below the threshold.
Remember to execute this code in an appropriate Python environment with the necessary dependencies installed. Additionally, this code may need modifications to suit your specific requirements and integrate it into a Windows 8 environment effectively.
Disabling startup programs to free up memory
Fix Low Memory Warning Windows 8
| Program Name | Startup Impact | Disable |
|---|---|---|
| Program A | High | |
| Program B | Medium | |
| Program C | Low | |
| Program D | High | |
| Program E | Medium |
Increasing virtual memory manually
To manually increase virtual memory on Windows 8, follow these steps:
1. Press the Windows key + R to open the Run dialog box.
2. Type "sysdm.cpl" and hit Enter to open the System Properties window.
3. In the System Properties window, go to the "Advanced" tab and click on the "Settings" button under the Performance section.
4. In the Performance Options window, go to the "Advanced" tab and click on the "Change" button under the Virtual Memory section.
5. Uncheck the "Automatically manage paging file size for all drives" option.
6. Select the drive you want to adjust the virtual memory for and click on the "Custom size" radio button.
7. Enter the initial and maximum size values for the virtual memory, which should be larger than the recommended value.
8. Click on the "Set" button and then click on "OK" to save the changes.
By increasing the virtual memory manually, you can resolve low memory warnings and improve system performance.
Remember to restart your computer for the changes to take effect.
Restoring web browser settings to fix memory errors
Restoring Web Browser Settings to Fix Memory Errors
If you're experiencing memory errors or low memory warnings on your Windows 8 computer, one potential solution is to restore your web browser settings.
First, close all open browser windows and exit the browser completely. Then, follow these steps:
1. Open the Control Panel by searching for it in the Start menu.
2. In the Control Panel, select "Network and Internet" and then "Internet Options."
3. In the Internet Options window, go to the "Advanced" tab.
4. Click on the "Reset" button under the "Reset Internet Explorer settings" section.
5. Check the box that says "Delete personal settings" and click "Reset."
6. After the reset is complete, restart your computer and open your web browser again.
Restoring your web browser settings can help resolve memory errors by clearing out any corrupt or conflicting settings that may be causing the problem. Give it a try and see if it improves your computer's performance in the meantime.

