Windows 10 is renowned for its versatility and efficiency, but occasionally, it may encounter the frustrating issue of not responding. In this article, we delve into the causes behind this error and provide you with practical solutions to tackle the Windows 10 not responding issue effectively.
Troubleshoot and Fix Windows 10 not responding
Troubleshoot and Fix Windows 10 Not Responding Error:
1. Open Task Manager by pressing Ctrl + Shift + Esc and check if any unresponsive programs are running. End those tasks to free up system resources.
2. Scan your computer for viruses and malware using Windows Defender Antivirus or a trusted antivirus software like Avast or Kaspersky Lab. Viruses can cause system slowdowns.
3. Check for Windows updates by going to Settings > Update & Security > Windows Update. Install any available updates as they often include bug fixes and performance improvements.
4. Run the System File Checker tool to scan and repair corrupt system files. Open Command Prompt as an administrator, then type sfc /scannow and press Enter.
5. Perform a disk check using the CHKDSK command. Open Command Prompt as an administrator, then type chkdsk C: /f and press Enter. Replace “C” with the appropriate drive letter.
6. Update your device drivers by opening Device Manager and right-clicking on each device with a yellow exclamation mark. Select “Update driver” and follow the on-screen instructions.
Remember to reboot your computer after each troubleshooting step. If the issue persists, seek further technical support.
Restart your computer for a quick fix
Restarting your computer can often resolve the “Windows 10 Not Responding” error quickly and easily.
To do this, follow these steps:
1. Save any open files and close all programs.
2. Click on the “Start” menu in the bottom left corner of your screen.
3. Select the “Power” option and then choose “Restart”.
Note: If your computer is completely frozen and you are unable to access the Start menu, you can force a restart by holding down the power button until your computer turns off, and then turning it back on.
Once your computer restarts, check if the error is resolved. This simple action can often clear any temporary issues or conflicts that may be causing the problem.
If the error persists, you may need to explore other troubleshooting methods or seek technical support.
Update drivers and operating system
To fix the Windows 10 Not Responding error, it is important to update your drivers and operating system. Outdated drivers or an outdated operating system can lead to system instability and unresponsiveness. Here’s how to update them:
1. Press Ctrl + Shift + Esc to open the Task Manager.
2. Check for any processes that are using a high amount of CPU or memory.
3. If you suspect a virus or malware infection, run a full scan using your antivirus software like Microsoft Defender Antivirus or Avast.
4. Open Windows Update from the Start menu and check for any available updates.
5. Use the System File Checker to scan for and repair any corrupted system files.
6. Update your device drivers by opening Device Manager from the Control Panel.
7. Right-click on the device you want to update and select “Update driver.”
8. Follow the on-screen instructions to complete the driver update.
Remember to reboot your computer after updating drivers and the operating system to ensure the changes take effect. This should help resolve the Windows 10 Not Responding error and improve system performance.
Repair corrupted system files
Repairing corrupted system files is essential for resolving the “Windows 10 Not Responding” error. Follow these steps to fix the issue efficiently:
1. Open the Command Prompt as an administrator by right-clicking the Start button and selecting it from the context menu.
2. In the Command Prompt window, type sfc /scannow and press Enter. This will initiate the System File Checker tool to scan and repair corrupted files automatically.
3. Wait for the scan to complete. The tool will replace any corrupted files it finds with the correct versions from the Windows cache.
4. Once the process finishes, restart your computer to apply the changes.
If the “Windows 10 Not Responding” error persists, you can also try running the DISM (Deployment Image Servicing and Management) tool to repair the Windows image. Open Command Prompt as an administrator, type dism /online /cleanup-image /restorehealth, and press Enter. Restart your computer after the repair process completes.
These steps should help resolve the issue and restore your system’s functionality.
Scan for and remove viruses and malware
1. Open the Task Manager by pressing Ctrl + Shift + Esc and click on the “Processes” tab. Look for any suspicious processes or high CPU/memory usage. End these processes if necessary.
2. Use Microsoft Defender Antivirus to scan your computer for viruses and malware. Open the Start menu, type “Windows Security,” and click on the app. Select “Virus & Threat Protection” and click on “Quick Scan” to start the scan.
3. If Microsoft Defender doesn’t find any threats, try using a trusted third-party antivirus software like Kaspersky or Norton. Download and install the software, then perform a full system scan.
4. Check for software bugs or conflicts by updating your device drivers. Right-click on the Start menu, select “Device Manager,” and expand the categories. Right-click on each device, select “Update driver,” and follow the instructions.
5. Clear the cache and temporary files on your computer. Open the Control Panel, select “Internet Options,” click on the “General” tab, and under “Browsing history,” click on “Delete…” Choose the items to delete and click on “Delete.”
By following these steps, you can ensure your computer is free from viruses and malware, which may be causing the “Not Responding” error.
Perform a clean boot to resolve issues
Performing a clean boot can help resolve Windows 10 not responding errors. This process allows you to start your computer with only essential services and drivers, eliminating any conflicts that may be causing the issue.
To perform a clean boot, follow these steps:
1. Press the Windows key + R to open the Run dialog box.
2. Type “msconfig” and press Enter.
3. In the System Configuration window, go to the “Services” tab.
4. Check the “Hide all Microsoft services” box, then click “Disable all“.
5. Next, go to the “Startup” tab and click “Open Task Manager“.
6. In Task Manager, disable any startup items by right-clicking on them and selecting “Disable“.
7. Close Task Manager and go back to the System Configuration window.
8. Click “OK” and then “Restart” to start your computer in a clean boot state.
After the clean boot, check if the Windows 10 not responding error persists. If it doesn’t, you can gradually enable services and startup items to identify the specific cause of the issue.
Clear temporary files to improve performance
Clearing temporary files is a simple yet effective way to improve the performance of your Windows 10 system. These files can accumulate over time and take up valuable space, causing your computer to slow down. To clear them, follow these steps:
1. Open the Task Manager by pressing Ctrl + Shift + Esc.
2. In the Task Manager window, click on the “More details” option if it’s available.
3. Go to the “Processes” tab and look for any suspicious or unnecessary processes that are using a high amount of CPU or memory.
4. Right-click on the process and select “End task” to stop it.
5. Open the File Explorer by pressing Windows key + E.
6. In the File Explorer window, navigate to the “C:” drive or the drive where your Windows is installed.
7. Open the “Users” folder, then your username folder, and finally the “AppData” folder (this folder may be hidden, so make sure to enable hidden files and folders).
8. In the “AppData” folder, open the “Local” folder and delete any temporary files or folders you find.
9. Repeat the same process for the “Roaming” folder if necessary.
10. Empty your Recycle Bin to permanently delete the files.
By following these steps, you can clear temporary files and optimize your Windows 10 system for improved performance.
Set up Task Manager for fast force-quit
To quickly force-quit unresponsive programs on Windows 10, you can set up Task Manager for fast access. This can help improve productivity and resolve errors. Here’s how to do it:
1. Press Ctrl + Shift + Esc to open Task Manager instantly.
2. In Task Manager, click on the Options tab.
3. Check the box that says “Always on Top” to keep Task Manager visible at all times.
4. Next, go to the Details tab and right-click on the column headers.
5. Choose the columns you want to display, such as Name, Status, and Memory.
6. You can also set the priority of a program by right-clicking on it and selecting “Set Priority“.
7. To force-quit an unresponsive program, select it and click on the “End Task” button.
By setting up Task Manager for fast force-quit, you can effectively manage and troubleshoot unresponsive programs on your Windows 10 computer.
Use built-in troubleshooters for problem-solving
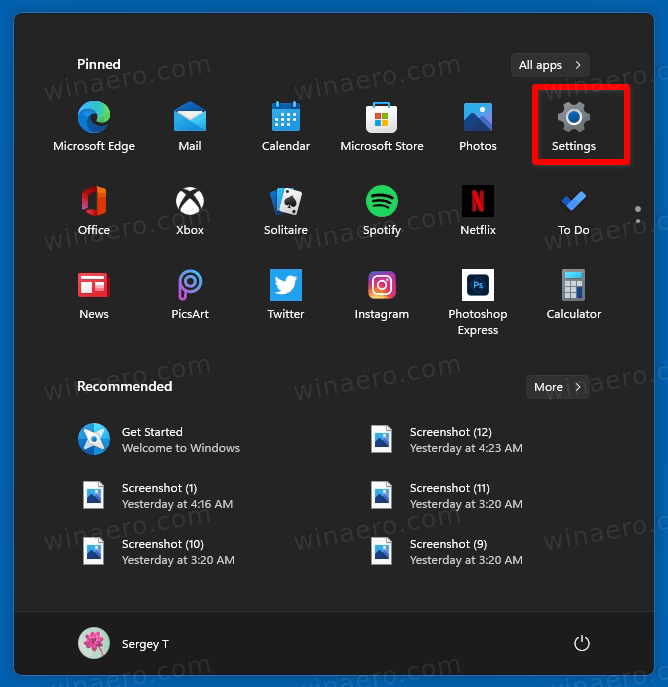
- Open Settings by clicking on the Start button and selecting the gear icon.
- In the Settings window, click on Update & Security.

- Select Troubleshoot from the left-hand menu.
- Click on Additional troubleshooters to access more options.
- Choose the appropriate troubleshooter based on the issue you are facing from the list of available options.
- Click on the troubleshooter and then select Run the troubleshooter.
- Follow the on-screen instructions provided by the troubleshooter to diagnose and fix the problem.
- If the troubleshooter is able to identify and fix the issue, restart your computer and check if the problem is resolved.

- If the troubleshooter is unable to resolve the problem, consider trying a different troubleshooter or exploring alternative solutions.
Contact the developer for program support
If you’re experiencing the “Windows 10 Not Responding Error,” contacting the developer for program support can help resolve the issue. Follow these steps to get in touch:
1. Identify the program causing the problem: Check the Task Manager (Ctrl + Shift + Esc) for unresponsive applications or processes.
2. Reach out to the developer: Visit their website or search for their contact information online.
3. Provide details: When contacting the developer, describe the issue, including any error messages or symptoms you’re experiencing.
4. Seek additional help if needed: If the developer doesn’t offer support, consider reaching out to Microsoft or seeking assistance from a reputable tech support service.
Remember, it’s crucial to keep your computer protected with reliable antivirus software like Kaspersky Lab or Norton. Regularly update your software, drivers, and Windows itself to prevent software bugs and security vulnerabilities.

